Last week, I showed you the process of creating the cover for Mary Crowell's new album (see it here). The project was a success! Read her blog post about our collaboration here. This week, I have been working on the art for the back cover.
"Rupus Fugue" by Starr Weems. 15x15 Watercolor on 140 lb .paper.
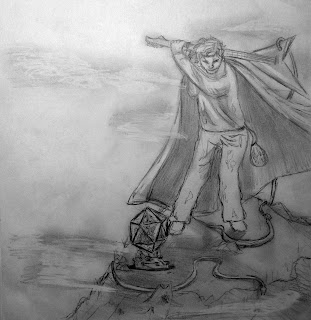
The image is based on one of Mary's songs and portrays Rupus Fugue, a crazy seer. My mission: To create a man with ragged clothing and a green cape swinging an electric guitar like a golf club to hit a giant D20 that is being upheld by a kobold on a misty mountain top. A serpentine dragon is visible in the distance. A purple dice bag and a crow are bonus items.
Step one: Research and Sketch Ideas
I looked at lots of pictures of dice, capes, guitars and golf swings. A former student of mine was nice enough to video himself swinging an electric guitar like a golf club. I want to know what his neighbors thought.
Step two: Choose a Thumbnail to Develop
I start with this guy...
And revise...
And revise more...
Step Three: Enlarge and Transfer
I transfer the image to my paper.
Step Four: Apply Drawing Gum and Pour the Layers
I Mask out the brightest lights with the drawing gum.
Pour and lift layer one..
Pour and lift layer two...
Pour and lift layer three...
Step Five: Start all Over Again
Yep, really. Start all over. I decided that Rupus and the sky were too close in value. It just wasn't working. Getting the values right when pouring is the most important thing. You can't fix it with color. That's like trying to fix a problem with the proportions of a pencil drawing with some really great shading. Back to the drawing board. I do everything I just did all over again, changing a few things.
Step Six: Remove Drawing Gum and Scrub
I remove the masking with a special tool and then lift paint out with a scrubber and a sponge.
Step Seven: Direct Paint
I add details with direct paint. I'm finished! Mary's son said I rolled a natural 20 on my art check. Making geeky art is fun work. :)
Questions? Contact me or leave a comment below. To see more step-by-step photos of how paintings like this one are created, see Start to Finish: Pouring Watercolor. You can also connect with me on Facebook to see my latest work.


No comments:
Post a Comment